Let’s say you want to emulate the Tenda AC6. Many vendors let you download firmware versions from their website. Once you chose and downloaded your firmware, you need to unpack and extract the binary with binwalk.
user@Azeria-Lab-VM $ wget https://down.tendacn.com/uploadfile/AC6/US_AC6V1.0BR_V15.03.05.16_multi_TD01.rar
user@Azeria-Lab-VM $ unrar e US_AC6V1.0BR_V15.03.05.16_multi_TD01.rar
user@Azeria-Lab-VM $ binwalk -e US_AC6V1.0BR_V15.03.05.16_multi_TD01.bin

DECIMAL       HEXADECIMAL     DESCRIPTION
--------------------------------------------------------------------------------
64            0x40            TRX firmware header, little endian, image size: 6778880 bytes, CRC32: 0x80AD82D6, flags: 0x0, version: 1, header size: 28 bytes, loader offset: 0x1C, linux kernel offset: 0x1A488C, rootfs offset: 0x0
92            0x5C            LZMA compressed data, properties: 0x5D, dictionary size: 65536 bytes, uncompressed size: 4177792 bytes
1722572       0x1A48CC        Squashfs filesystem, little endian, version 4.0, compression:xz, size: 5052332 bytes, 848 inodes, blocksize: 131072 bytes, created: 2017-04-19 16:18:08

user@Azeria-Lab-VM $ cd _US_AC6V1.0BR_V15.03.05.16_multi_TD01.bin.extracted
What you want from this is the Squashfs filesystem.
user@Azeria-Lab-VM $ ls _US_AC6V1.0BR_V15.03.05.16_multi_TD01.bin.extracted/ | grep squashfs-root
squashfs-root
Inside the Azeria Labs VM, boot up the ARMv7 environment by clicking on the blue ARM icon in the sidebar. Wait until you see the following screen.
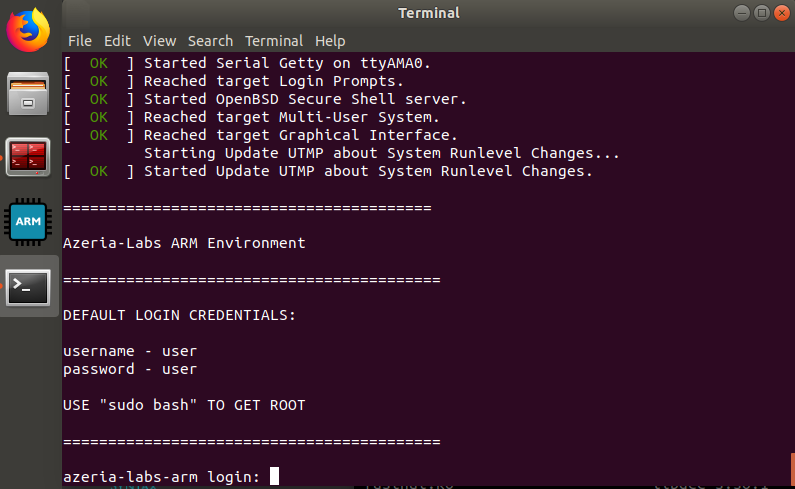
This is the terminal you can start your firmware emulation in. The emulation will make constant noise by spitting errors saying it can’t access certain peripherals.
Let’s start with the firmware emulation. From the folder binwalk extracted, run the following command to transfer the squashfs-root to the Arm environment.
user@Azeria-Lab-VM $ rsync -av squashfs-root user@192.168.0.1:/home/user/Tenda-AC6
Minimize this terminal and open Terminator (red terminal icon in the side bar). Terminator is neat because it let’s you split screens more easily. You can SSH into the Arm environment with the shortcut “ssh arm”.
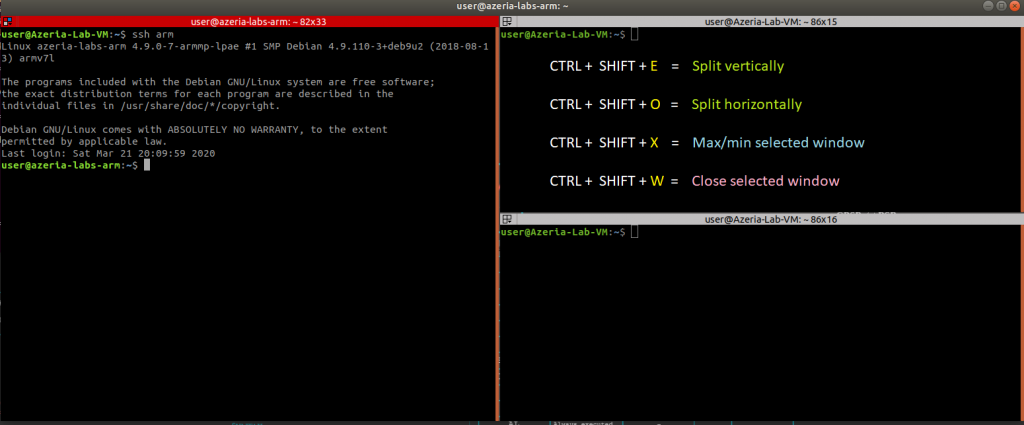
You can install Terminator with:
user@Azeria-Lab-VM $ sudo apt-get install terminator
In your Arm environment, you should now have a folder with the squashfs-root of the firmware you extracted. In this folder, you create a script that starts the emulation. Normally, and in most cases, this process is simple and the script looks like this:
# disable ASLR
sudo sh -c "echo 0 > /proc/sys/kernel/randomize_va_space"

# Switch to legacy memory layout. Kernel will use the legacy (2.4) layout for all processes
sudo sh -c "echo 1 > /proc/sys/vm/legacy_va_layout"

# Mount special folders to the existing Debian ARM environment to provide the emulated environment awareness of the Linux surroundings
sudo mount --bind /proc /home/user/Router/squashfs-root/proc
sudo mount --bind /sys /home/user/Router/squashfs-root/sys
sudo mount --bind /dev /home/user/Router/squashfs-root/dev

# Trigger the startup of the firmware
sudo chroot /home/user/Router/squashfs-root /etc/init.d/rcS
Router firmware emulation is not magic, it’s as simple as the above script. However, turns out there are always exceptions to the rule. The first time I tried emulating the Tenda AC6 firmware, this script didn’t work and the process kept crashing without booting up in the first place. I solved this problem in a rather messy way, by reverse engineering the firmware and tracing back which parameters it’s complaining about. I wrote a program (hooks.c on Github)to simply give it what it wants and voila, it worked. I thought this was a very custom way of making this specific version of the firmware work. To my surprise, emulating a different Tenda firmware (AC15) resulted in the same problem, and guess what? The hooks I coded for the AC6 firmware still worked. I haven’t tested it on other Tenda firmware versions, but if seeing it work on the two I randomly selected made me want to release it for people who might run into the same problem. And who know, maybe it works for more Tenda versions? You can find the code on the Azeria Labs GitHub and on the Lab VM.
But let’s quickly go through the process of cross-compiling it for your emulation:
user@Azeria-Lab-VM $ wget https://uclibc.org/downloads/binaries/0.9.30.1/cross-compiler-armv5l.tar.bz2
user@Azeria-Lab-VM $ tar xjf cross-compiler-armv5l.tar.bz2
user@Azeria-Lab-VM $ wget https://raw.githubusercontent.com/azeria-labs/Arm-firmware-emulation/master/hooks.c
user@Azeria-Lab-VM $ cross-compiler-armv5l/bin/armv5l-gcc hooks.c -o hooks.so -shared
user@Azeria-Lab-VM $ scp hooks.so user@arm:/home/user/Tenda-AC6/squashfs-root/hooks.so
Inside the Arm environment, cd to the folder you transferred the squashfs-root to and download the emulate.sh script.
user@azeria-labs-arm:~/Tenda-AC6$ wget https://raw.githubusercontent.com/azeria-labs/Arm-firmware-emulation/master/emulate.sh
The emulation script looks similar to the one I mentioned earlier, with the difference that it runs with the hooks.so file.
# Script to emulate Arm-based router firmware. This example is based on a QEMU emulated Debian environment.
# You can download the VM with the QEMU Armv7 emulation (link in README)

# br0 interface existence is necessary for successful emulation
sudo ip link add br0 type dummy

# Disable ASLR for easier testing. Can be re-enabled with the same command by replacing 0 with 1 or 2.
sudo sh -c "echo 0 > /proc/sys/kernel/randomize_va_space"

# Switch to legacy memory layout. Kernel will use the legacy (2.4) layout for all processes to mimic an embedded environment which usually has old kernels
sudo sh -c "echo 1 > /proc/sys/vm/legacy_va_layout"

# Mount special linux folders to the existing Debian ARM environment to provide the emulated environment with the Linux context.
# Replace /home/user/Tenda with the path to your extracted squashfs-root.
sudo mount --bind /proc /home/user/Tenda/squashfs-root/proc
sudo mount --bind /sys /home/user/Tenda/squashfs-root/sys
sudo mount --bind /dev /home/user/Tenda/squashfs-root/dev

# Set up an interactive shell in an encapsulated squashfs-root filesystem and trigger the startup of the firmware.
# Replace /home/user/Tenda with the path to your extracted squashfs-root.
sudo chroot /home/user/Tenda/squashfs-root /bin/sh -c "LD_PRELOAD=/hooks.so /etc_ro/init.d/rcS"
Switch to the violet terminal (the one that popped up when you started the Arm environment) and run the emulation script from there. The reason is that it will generate a lot of noise, spitting out errors about not being able to reach certain peripherals and so on.
user@azeria-labs-arm:~/Tenda$ sudo ./emulate.sh
Now, let’s check if the firmware emulation has been successful. The first thing you want to check is if new processes are running.
user@azeria-labs-arm:~$ sudo netstat -tlpn
sudo: unable to resolve host Tenda: Resource temporarily unavailable
Active Internet connections (only servers)
Proto Recv-Q Send-Q Local Address Foreign Address  State    PID/Program name
tcp     0     0 0.0.0.0:22          0.0.0.0:*      LISTEN   236/sshd
tcp     0     0 0.0.0.0:5500        0.0.0.0:*      LISTEN   809/miniupnpd
tcp     0     0 0.0.0.0:9000        0.0.0.0:*      LISTEN   450/ucloud_v2
tcp     0     0 172.18.166.182:80   0.0.0.0:*      LISTEN   585/dhttpd
tcp     0     0 192.168.0.1:80      0.0.0.0:*      LISTEN   448/httpd
tcp     0     0 127.0.0.1:10002     0.0.0.0:*      LISTEN   450/ucloud_v2
tcp     0     0 127.0.0.1:10003     0.0.0.0:*      LISTEN   450/ucloud_v2
tcp     0     0 0.0.0.0:10004       0.0.0.0:*      LISTEN   451/business_proc
tcp6    0     0 :::22               :::*           LISTEN   236/sshd
Looks good! Now let’s check out the router interface by browsing to 192.168.0.1.
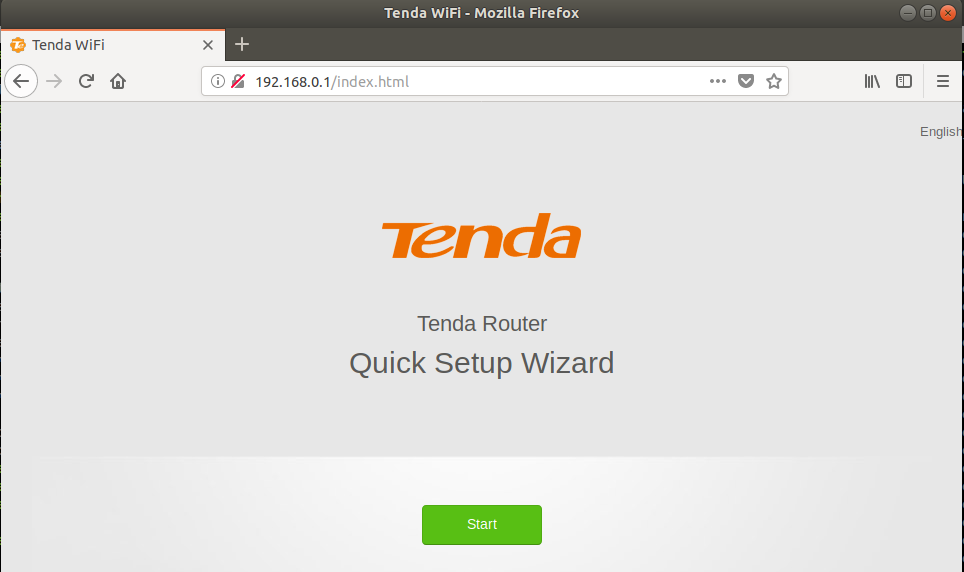
Perfect!
Now you can start playing around with the interface, attaching to processes, and debug them. Just a quick hint on how to attach to an httpd process with GDB to get you started:
user@azeria-labs-arm:~$ ps aux | grep httpd
root   448   0.3 0.2   3692  2136 ?      Ss  02:00  0:03 httpd
root   585   0.1 0.0   2628   716 ?      S   02:00  0:01 dhttpd
user   9073  0.0 0.0   6736   532 pts/0  S+  02:16  0:00 grep httpd
user@azeria-labs-arm:~$ sudo gdb -q -p 448
Happy hacking!